

How authentication works
Every Payaza API request requires anAuthorization header. The format is:
- The prefix is
Payaza— notBearer - Your API key must be Base64-encoded before use
Step 1 — Retrieve your API key
1
Log in to the Payaza dashboard
Go to business.payaza.africa and log in to your account.
2
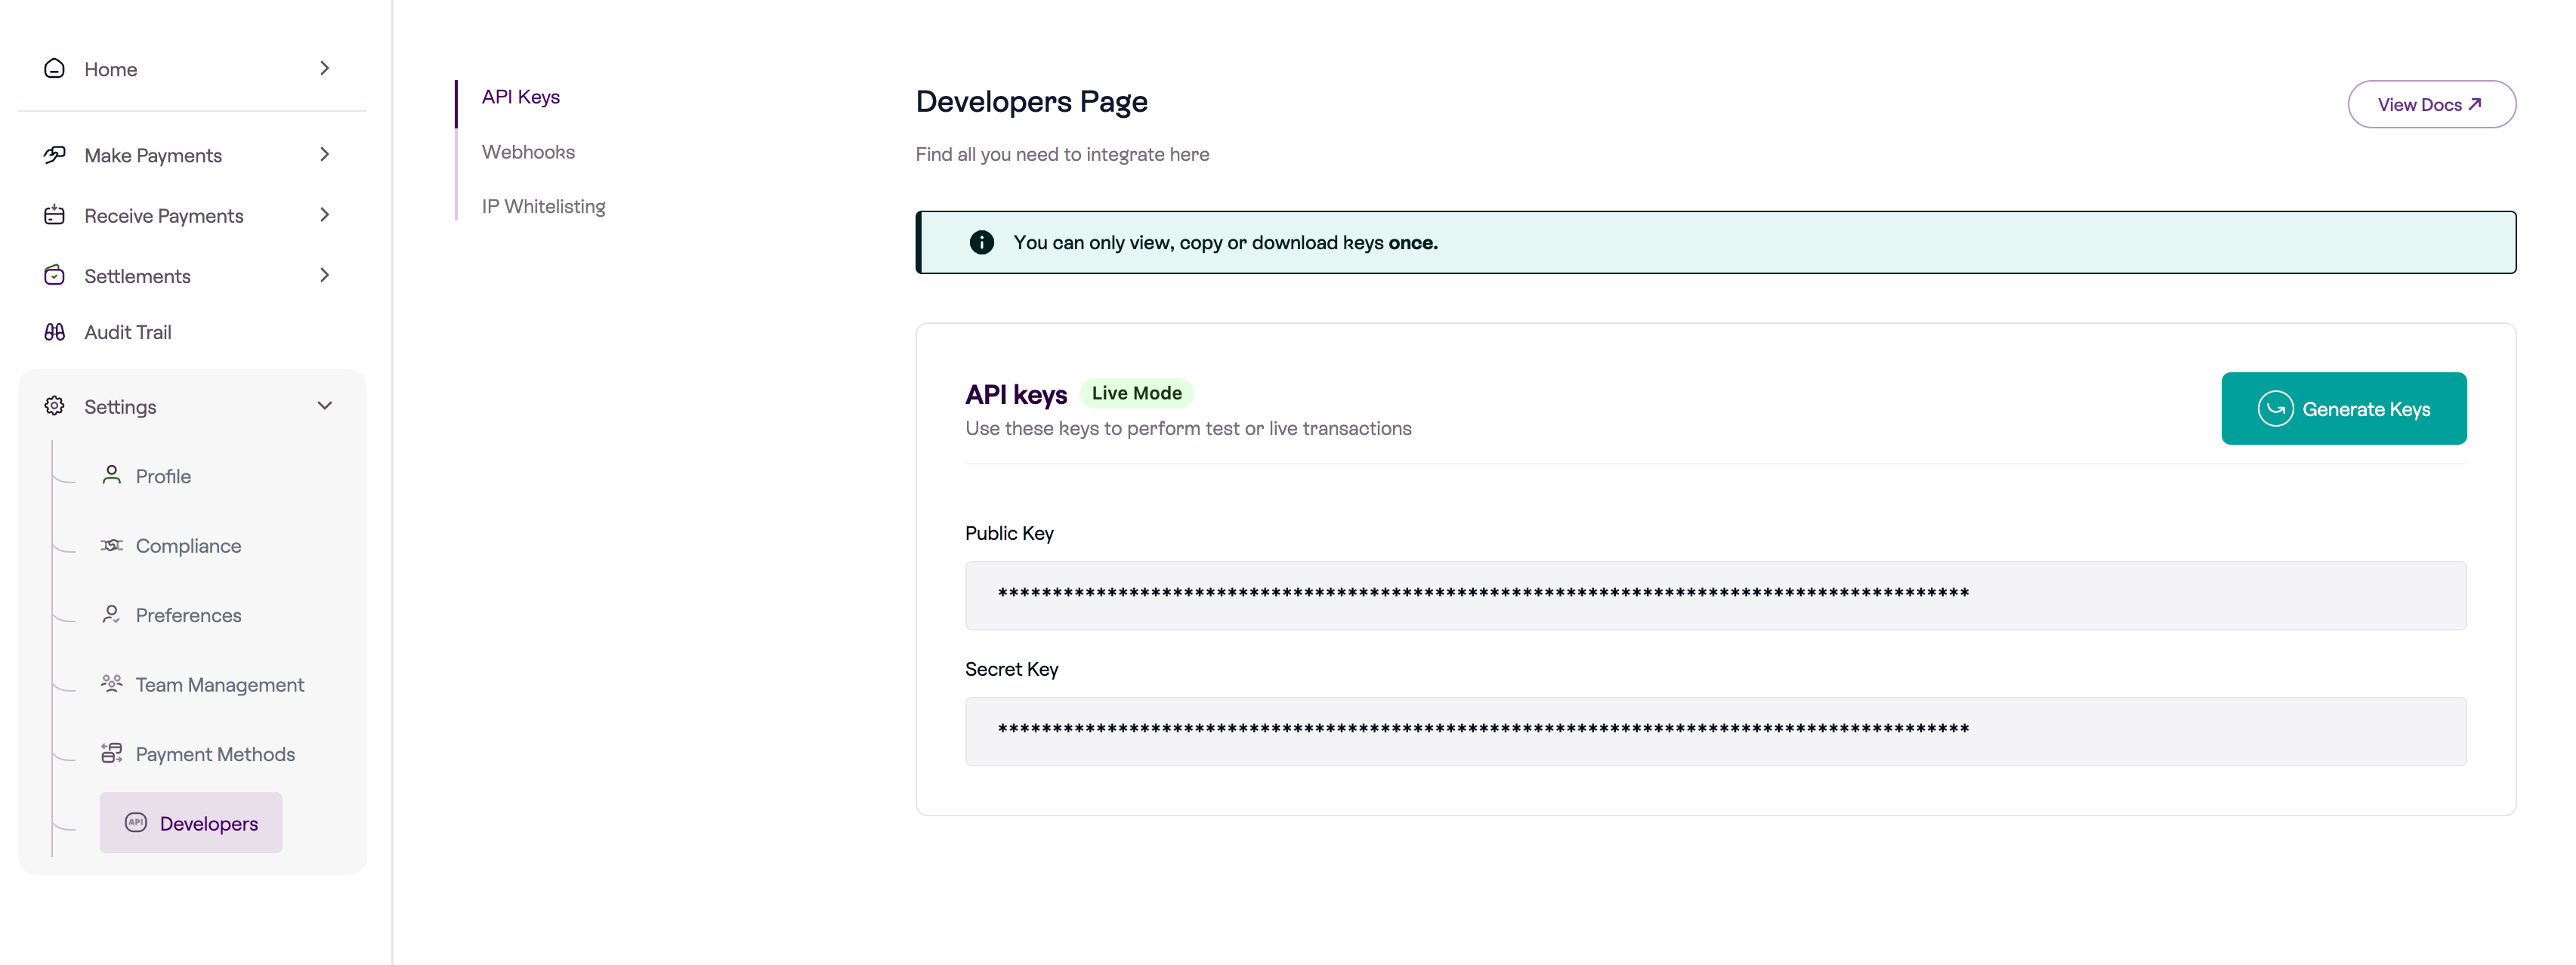
Open Settings → Developers
Click Settings in the left sidebar, then select Developers from the dropdown.
3
Generate your keys
Click the Generate Keys button to create your API keys. Toggle between Test Mode and Live Mode to retrieve the key for each environment.
Step 2 — Encode your key in Base64
Your API key must be Base64-encoded before placing it in theAuthorization header.
Step 3 — Make an authenticated request
These are the possible headers that can be added to a Payaza API request:X-TenantID is required for some APIs but not all. For APIs that require it, use test during development and live in production. See the Required headers by API table below for a full breakdown.Required headers by API
Different Payaza APIs require different combinations of headers. Use this table as a quick reference before making requests.X-ProductID: app is only required for the Momo, XOF, ZAR, and SLE collections API (/subsidiary/collections/v1/...). All other APIs do not require it.X-TenantID is not required for Apple Pay, Google Pay, Virtual Accounts, Refunds, and Chargebacks. All other listed APIs require X-TenantID set to test (development) or live (production).Test vs Live environments
Payaza uses a single API base URL (https://api.payaza.africa/live/) for both environments. The /live/ segment in the URL is a fixed path prefix — it does not change between environments. Only the X-TenantID header and the API key distinguish test from live.
You can begin testing immediately after creating your Payaza account. KYB (Know Your Business) verification is only required to access the live environment.
Authentication errors
A failed authentication returns this response:What’s next
Getting Started
Walk through account setup and make your first API call end-to-end.
Webhooks
Receive real-time payment notifications when events happen on your account.
Transfers
Start sending payouts to bank accounts and mobile wallets.
Errors
A reference for all API error responses and how to resolve them.